Sunday, December 1, 2013

Masai Warriors

Another update for the Deutsch-Ostafrika project.  These are Masai warriors employed as scouts by my British forces.


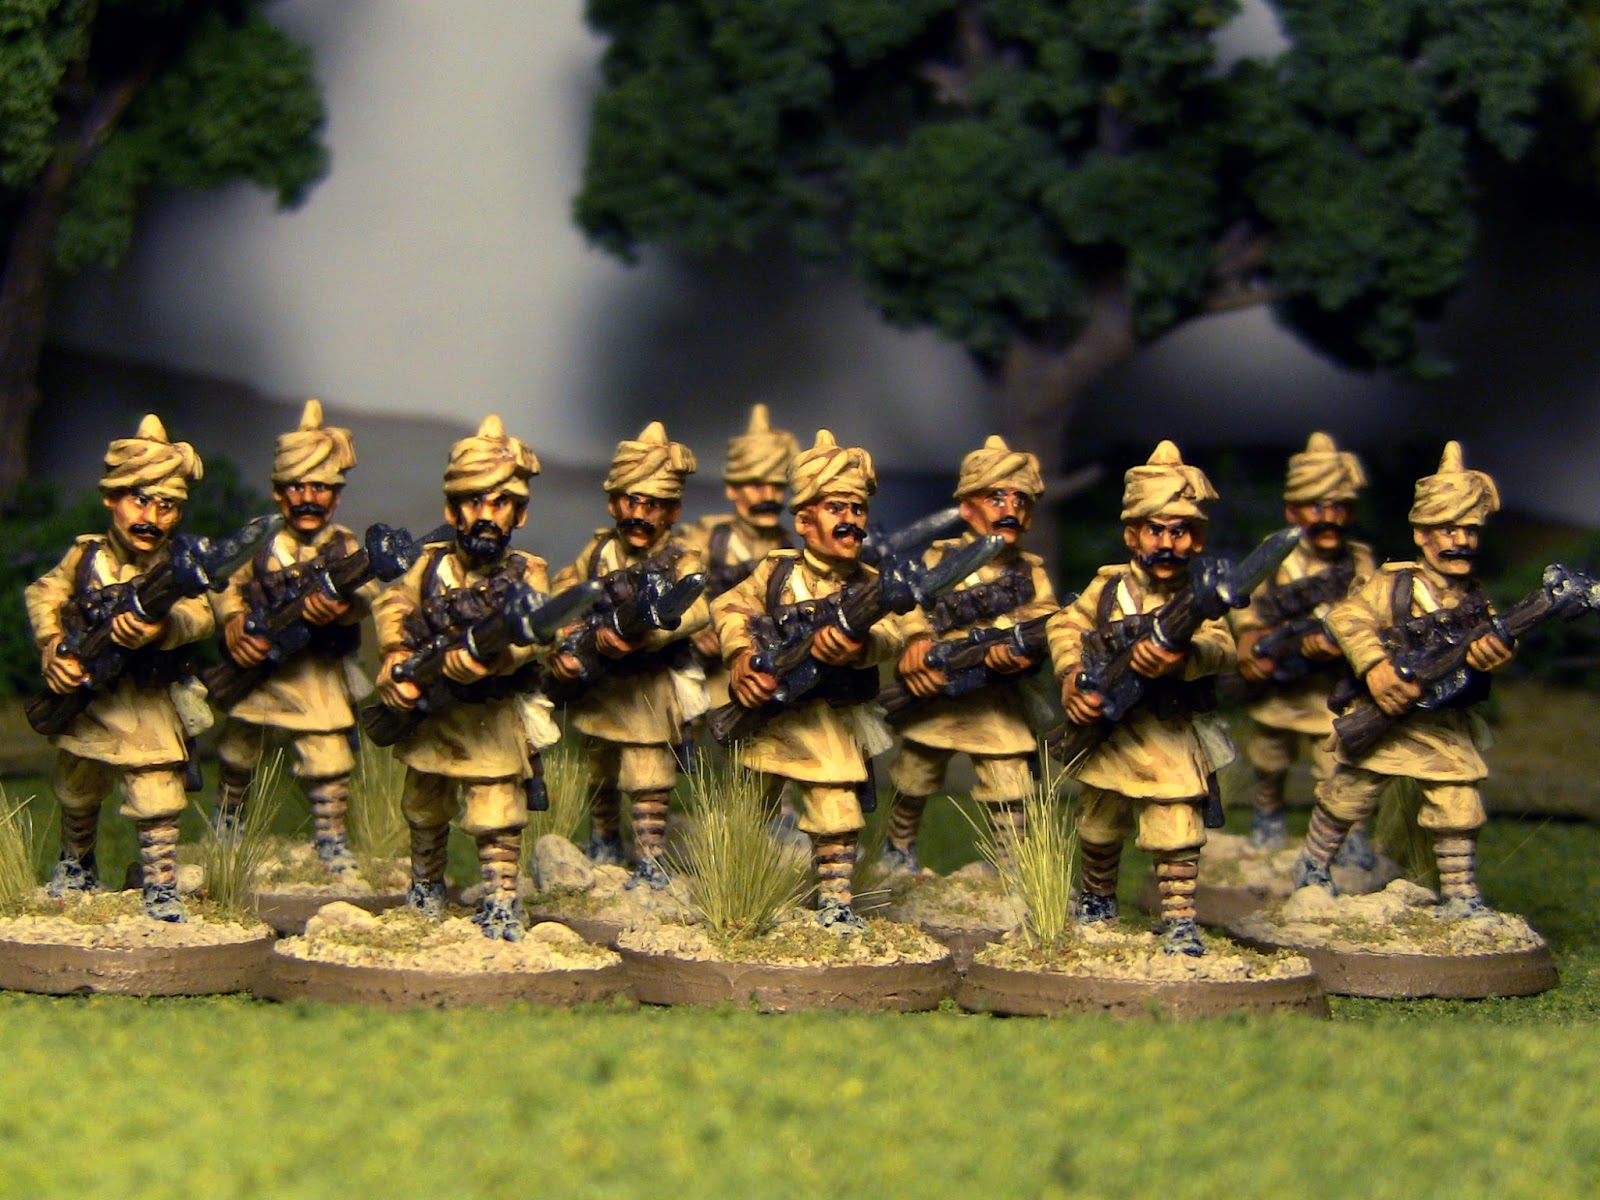
Figures are from Foundry's Masai line. The figures come with shields, but irritatingly you have to buy Masai spears in a separate pack.  The Foundry website shows them with swords, but no swords were included with the two packs I ordered, so my troops are spears only.  These annoyances aside, the figures are beautifully sculpted and were very well cast with little flash.  Though expensive, I don't regret forking over the cash.


 For my unit, I went with a mix of bare heads and feathered headdresses. I opted for natural hair color rather than try to paint the red ochre often see with Masai. For cloth, most of my warriors are wearing the traditional red/oranges, but I've included some purple trade cloth to give them a bit more variety.

I referenced old Masai shield designs on Google images, but rather than copy specific shield patterns, I opted for fanciful designs using historical design elements. I also used various shades of orange/red brown to add more variety. Unless your are a Masai expert, I think they could pass as authentic enough to the lay person.

I have to say I think this is my favorite looking unit for Ostafrika and they will add a nice bit of color to the rest of the relatively drab soldiers.


Sunday, November 17, 2013

New Heroes and Villains

The kids wanted to get a little painting in, and we managed to knock out a few new figures.


First up from the boys are Black Cat and American Dream:


Black Cat is from Reaper, and American Dream is an Old Glory figure. The boys did the bulk of the  painting, and then asked me to come in and do some clean up and detailing.

For myself, I finished up the half painted Beast and then painted a figure that we'll be using for Juggernaut.  These figures are also from Old Glory and Reaper.


Saturday, November 16, 2013

Deutsch-Ostafrika: First British Troops and Some Animals

After having painted my German troops a while back,  it was time to return to Ostafrika and start on some British opponents.  First up are some Indian Muslim Troops:


These are from Copplestone Castings Back of Beyond range, and are only available as variations on the same basic pose. I would have preferred a bit more variety for skirmish gaming, but they are well sculpted and were available at my local hobby store.  The figures are a a little larger than Brigade Games' Sikhs, but not too bad. I've also purchased some British officers for them, but these have yet to be painted.

In addition to the troops, I've also painted up some animals:


I bought the rhinos a while ago and believe they were also manufactured  by Copplestone, but I don't have the packaging to confirm (and they are not currently listed on the Copplestone site).  They have been painted as black rhinos.


 The cattle are produced by Foundry, and can be found in the Masai section.  I have painted them to be Ankole-Watusi of eastern Africa.


Overall, I am very happy with how everything came out.


Sunday, October 20, 2013

The Bad Seed: Superhero AAR

Another afternoon of superhero gaming with the boys.  This time they wanted to run more figures (two superhero teams of four), so we we went for something bigger.

Green Goblin Girl, with the help of HYDRA, has secretly been breeding alien plants in the city's botanical garden. The spores from these plants have the ability to turn people into her goblin slaves!  Can our heroes destroy the plants and prevent her from taking control of the city?

Green Goblin Girl and the HYDRA goons lurk in the park, cultivating the plants.

The Fantastic Four and the X-Men arrive to stop her.

 The teams spot the mercenary Deadpool lurking down a side road and know he must be up to no good. They decide to surround him, while the Human Torch takes to the air and opens fire on him. Deadpool manages to squeeze up against the wall and avoids the flames.


Deadpool hops the wall and scores a shot on the Thing, while the HYDRA troops are drawn towards the street by all the noise. Luckily, Iceman and Firestar arrive. Deadpool avoids Firestar's flames, but Iceman manages to encase him in a block of ice, putting him out of action.


Green Goblin Girl throws a pumpkin bomb at Cyclops and Beast, but misses her targets. Our heroes begin moving into the garden to engage the enemy and destroy the plants.

Fierce fighting breaks out, and the Human Torch manages set one of the alien plants ablaze before it could release its spores. However, Green Goblin Girl manages to slip through the melee and make it to her truck, which is carrying barrels of harvested spores!  Can our heroes stop her before she can get away and release them into the city, causing its citizens to turn into evil automatons?


Thankfully Firestar spots her before she gets far, and the truck is engulfed in flames, destroying the spores!

As the battle continues in the garden, Deadpool manages to break free of the ice, cutting Firestar with his sword before Iceman can refreeze him.


Our heroes quickly defeat the remaining HYDRA troops and set about destroying the rest of the plants.


However, the Thing is too slow in destroying his plant, and gets  a face full of spores. As he begins to turn against his comrades, Firestar and Human Torch are forced to attack him until he is finally knocked out.

 The city was finally safe from Green Goblin Girl's spores.  Reed Richards took the Thing back to Fantastic Four headquarters, where he developed a serum to turn the Thing back into his normal heroic self.

Saturday, October 5, 2013

Doctor Who: Companions, Arch-Villains, and the TARDIS

In addition to getting my church built, I also managed to squeeze out of bit of painting as well.

First up are the second Doctor's companions, Zoe and Jamie:


The paint scheme for Zoe's outfit was taken from this photo:


For Jamie, I couldn't find a reference for him in that exact outfit, but I ended up using this photo for the tartan:


Overall, I have to say I am not a big fan of these Blacktree Design sculpts - I think they look nothing like the real actors.

Next up are the Master and Davros:


The sculpts for these look a bit more like the characters, but I think the torso on Davros is too long and there was a lot of flash under the arm that was difficult to clean out and make look good. For the Master, I decided to forgo his usual black gloves, as I think it would have just been too much black on the figure.

Finally, I picked up a TARDIS from Ainsty Castings:

 This is a very well cast resin model, with very little clean up required. The TARDIS has been several different shades of blue over the course of the program, but I opted for a deep, true blue rather than one of the greyer shades.  For the signage, I opted to paste on signs found online rather than try to do it by hand. My final version isn't really an exact match for any of the television props, but I think it still captures the spirit of the TARDIS.


Completed Central American Church


Well, it took a bit longer than I planned, but I finally completed the paper kit of Iglesia de la Asunción from Tobarra, Spain to use as the church in San Cristóbal, Golfonseca.

The main entrance.
Rear entrance
 The kit was originally designed to be built completely out of paper, but I felt that would not be sturdy enough for gaming. As such, the majority of the walls are built on to 1.5mm thick art board, and things like the roof tiles and buttresses were pasted on to cut up manila folders.  I would have liked to used thicker card for these elements, but it would have been very difficult to work with, especially for the curved roof of the bell tower. To compensate for that, I did build some card spines for under some roof elements to make them sturdier.

The curved roof of the bell tower.  A weather-vane is included for the bell tower, but I decided to leave it off as I thought it would get broken during storage and transport.
 For anyone else who wants to build this kit onto card, I would suggest you print out doubles of the wall elements. Use one set to guide cutting the card, and then the other for the final wrap of the walls.  The reason for this is you will need to trim the card to get the elements to fit behind the paper properly.For example, in the octagon section of the bell tower, I glued four walls to the paper cover and assembled the section.  I then measured the remaining spaces for last four walls and trimmed accordingly before sliding them in behind the paper and adding the roof.


On very interesting thing about this building, is that it is asymmetrical and other than the bell tower, I don't think it has any 90° angles on the corners. Looking at Google Street view of the real church, it seems to be squeezed in between several other buildings that may have forced this shape.


The lopsided design is more obvious from this angle.

The church ended up being a lot larger than I expected; the base plate is 28.5cm x 20cm, and the bell tower is about 26cm high.  It towers over my other buildings and in reality is probably a bit too grand for a village the size of San Cristóbal.  However,looking at my 15mm figures and where the door handles are, I think it is in the correct scale.


This was a fun project and I'm happy with the final results.

Wednesday, September 18, 2013

Radio Frente de Liberación Nacional

I always enjoy having appropriate music for my painting and gaming.  As such, I have created another Spotify radio station.  Here is Golfonseca's own Radio Frente de Liberación Nacional.  Power to the people and death to the tyrant Somoza!


Tuesday, September 17, 2013

15mm Central American/Caribbean Paper Church Kit

I have been looking for a 15mm church model for my Golfonseca AK47 village, but have had no luck with 15mm and HO scale producers.  Everything is either no longer in production or isn't quite the style I want. However, last night I stumbled across a free paper craft kit for a Spanish church at this website: blogtobarra.blogspot.com


The kit design is credited to Ángel Agustín and Jesús Arribas.  While a nice looking kit, there are a few issues for my need:
  • The images are only 96DPI resolution. While this is fine for a monitor, you are better off printing at 300DPI or higher.
  • The textures are rather flat and wouldn't blend well with my 3D painted models.
  • During my discussions on LAF, I learned that stone is not commonly found in Central American churches. Instead, most everything is adobe and stucco.
  • Not sure if this is going to be sturdy enough for wargaming.
Since this was looking like my best church option, I decided to use Photoshop to resize and retexture the kit. I found a nice 300DPI adobe texture photo on Google Images and used the magic wand and clone stamp tool to redo the wall textures and cover up the stones. The only part that didn't work well was on the very top of the tower, as the texture obliterated the architectural details. Instead, I used an adobe brick pattern at 50% opacity to try to disguise the stone as bricks.
Adobe wall texture and adobe brick overlay
 As such, the final result isn't completely correct for an average Central American church, but it would drive me insane trying to clean up this section pixel by pixel. 

As a final bit of detailing, I muted the colors on the roof tiles and used some wood texture on the doors to make them look a bit more realistic.

The original kit seemed slightly large for 15mm miniatures, and was also organized for printing on large sheets of paper. I decided to shrink the kit down to 80% of original and reorganized the pieces to fit onto to 11"x17" paper.

I just finished the reworking of the kit tonight, so have not had a chance to start building and check the durability. However, if you would like to try the modified kit yourself, I am linking to the JPEG pages HERE (warning: they are huge files). EDIT 01Oct13: Page 5 was missing the bell tower roof - it has now been added.


Once I have a chance to perform a test build, I'll prepare a follow up entry on the blog.

Mr. Agustín and Mr. Arribas, if you come across this modification to your kit, I hope you are OK with me distributing it.  If not, please do not hesitate to contact me.